
Animating with Vue — Vue Amsterdam Conference 2022 Summary series — Seventh Talk
How to use the Vue magic to create awesome animations, from simple ones to more complex ones, combining Vue with animation libraries.


Welcome! Happy to see you in the seventh part of my Vuejs Amsterdam Conference 2022 summary series, in which I share a summary of all the talks with you.
You can read my JSWorld Conference 2022 Summary series (in four parts) here, where I summarized all the first day’s talks. You can also find the previous Talks of the Vue Amsterdam conference 2022 in my blog.
(Recurring) Introduction
After two and a half years, JSWorld and Vue Amsterdam Conference were back in Theater Amsterdam between 1 and 3 June, and I had the chance to attend this conference for the first time. I learned many things, met many wonderful people, spoke with great developers, and had a great time. On the first day the JSWorld Conference was held, and on the second and third days, the Vue Amsterdam.
The conference was full of information with great speakers, each of whom taught me something valuable. They all wanted to share their knowledge and information with other developers. So I thought it would be great if I could continue to share it and help others use it.
At first, I tried to share a few notes or slides, but I felt it was not good enough, at least not as good as what the speaker shared with me. So I decided to re-watch each speech, dive deeper into them, search, take notes and combine them with their slides and even their exact words in their speech and then share it with you so that what I share with you is at least at the same level as what I learned from them.
A very important point
Everything you read during these few articles is the result of the effort and time of the speaker itself, and I have only tried to learn them so that I can turn them into these articles. Even many of the sentences written in these articles are exactly what they said or what they wrote in Slides. This means if you learn something new, it is because of their efforts.
Last but not least, I may not dig into every technical detail or live codings in some of the speeches. But if you are interested and need more information, let me know and I’ll try to write a more detailed article separately. Also, don’t forget to check out their Twitter/Linkedin.
Here you can find the program of the conference:
Animating with Vue
Ramona Biscoveanu - Frontend Developer at SAP
Sometimes our applications need a little bit of "wow" and we can do this with some "movement" just the perfect amount to make them more alive.
We will be looking at how to use the Vue magic to create awesome animations, from simple ones to more complex ones, combining Vue with animation libraries.
90s Websites
On 90s websites, there were sometimes a lot of motions and colors. But the only way we could have animations back then was with gifs. Just imagine the bandwidth those gifs consumed in the era of Dial-Up internet! So we end up with some tiny low-frame gifs to limit the bandwidth consumption, and this was the result:
Why animate?
One of the reasons we use animations these days, even back then, is to capture users' attention and focus.
Think of how many distractions we have, notifications on our phones, pop-ups on the websites, or the jumping icons on the dock on macOS.
We can also trick users into thinking that our website is a lot faster. We give them this perception that our APIs are faster by putting loaders and progress bars. Studies are saying if you have a custom loader you have a chance of keeping the people on our website longer.
Sometimes we try to inform our users efficiently. Maybe we have lots of things going on on our website and we want to tell the user what is the next step in the flow of the application with an animated button.
Other times we need interactive content for marketing materials to keep users there.
Animations are also powerful when you try to tell a story.
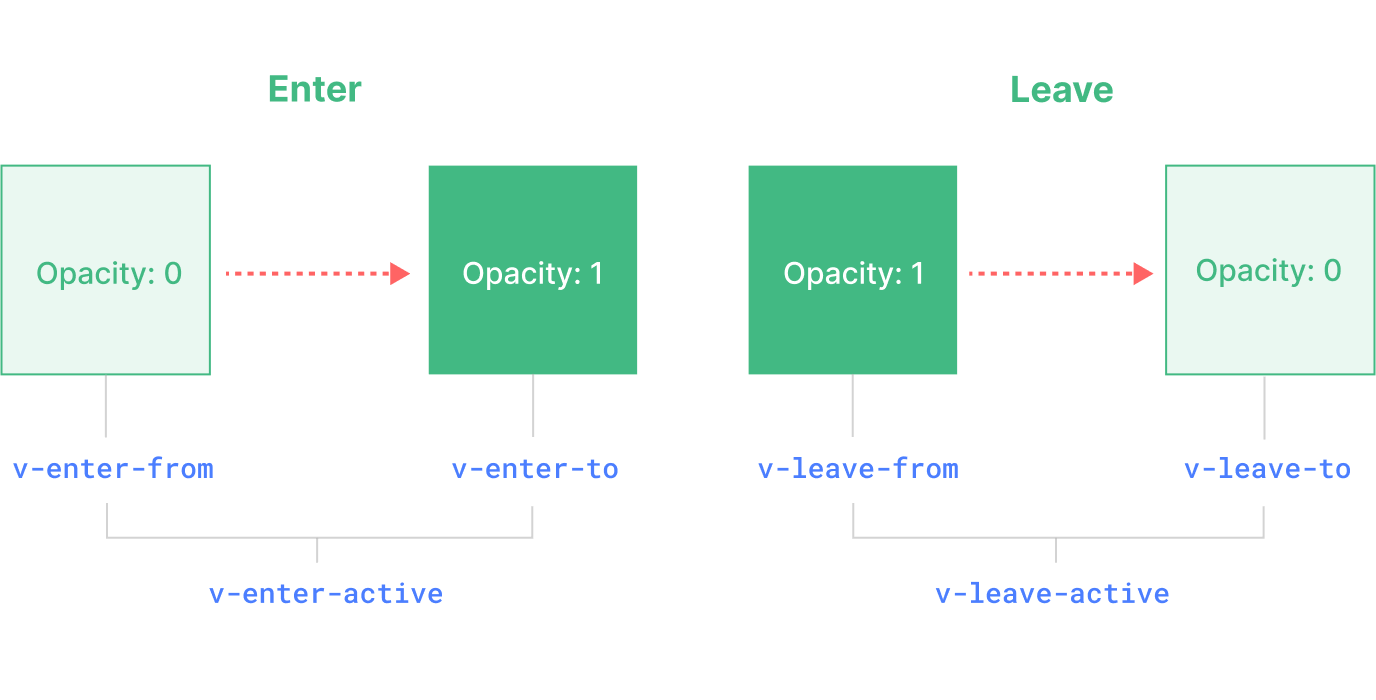
Vue <Transition />
In Vanilla JavaScript or jQuery, you need to manually calculate the timings and delays, and decide when to add or remove classes. But in Vue, we wrap the target element into the <Transition /> component and it does many of those hard things automatically. Here is a simple fade animation:
<transition name="fade">
  <p v-if="show">hello</p>
</transition>
.fade-enter-active, .fade-leave-active {
  transition: opacity .5s;
}
.fade-enter-from, .fade-leave-to
  opacity: 0;
}
This is how Vue handles that:
Vue <TransitionGroup />
<TransitionGroup> is a built-in component designed for animating the insertion, removal, and order change of elements or components that are rendered in a list.
This is a simple example of some tiles sliding on the screen:
<transition-group tag="div" class="tile-section" name="list" appear>
  <TileComp
    v-for="(tile, i) in tiles"
    :key="i + 'tile'"
    :header="tile.title"
    :content="tile.content"
    :footer="tile.footer"
  ></TileComp>
</transition-group>
.list-enter-active,
.list-leave-active {
  transition: all 1s ease;
}
.list-enter-from,
.list-leave-to {
  opacity: 0;
  transform: translateY(70px);
}
JavaScript Hooks
CSS is awesome and we can do a lot with it, but sometimes it’s not enough.
Vue provides some hooks on the <Transition /> component.
<Transition
  @before-enter="onBeforeEnter"
  @enter="onEnter"
  @after-enter="onAfterEnter"
  @enter-cancelled="onEnterCancelled"
  @before-leave="onBeforeLeave"
  @leave="onLeave"
  @after-leave="onAfterLeave"
  @leave-cancelled="onLeaveCancelled"
>
  <!-- ... -->
</Transition>
GreenSock GSAP
The GreenSock Animation Platform (GSAP for short) is a powerful JavaScript library that enables front-end developers and designers to create robust timeline-based animations.
One of the most important things you will hear a lot in GSAP is Tween.
A Tween is what does all the animation work — think of it like a high-performance property setter. You feed in targets (the objects you want to animate), a duration, and any properties you want to animate and when its playhead moves to a new position, it figures out what the property values should be at that point and applies them accordingly.
Common methods for creating a Tween (all of these methods return a Tween instance):
For simple animations (no fancy sequencing), the methods above are all you need!
gsap.to(".selector", {toVars});
gsap.from(".selector", {fromVars});
gsap.fromTo(".selector", {fromVars}, {toVars});
// special properties (duration, ease, etc.) go in toVar
Now let’s add GSAP to our tiles example:
<div class="tile-section">
  <TileComp
    v-for="(tile, i) in tiles"
    :key="i + 'tile'"
    :header="tile.title"
    :content="tile.content"
    :footer="tile.footer"
  ></TileComp>
</div>
import gsap from "gsap";
...
mounted() {
  gsap.from(".tile", {
    duration: 0.5,
    opacity: 0,
    scale: 0,
    y: 200,
    ease: "power2",
    stagger: 0.1,
  });
},

Vue animation counter
Another simple example of using GSAP to make nice animations can be a celebrate counter animation. Here you can see what it will look like:
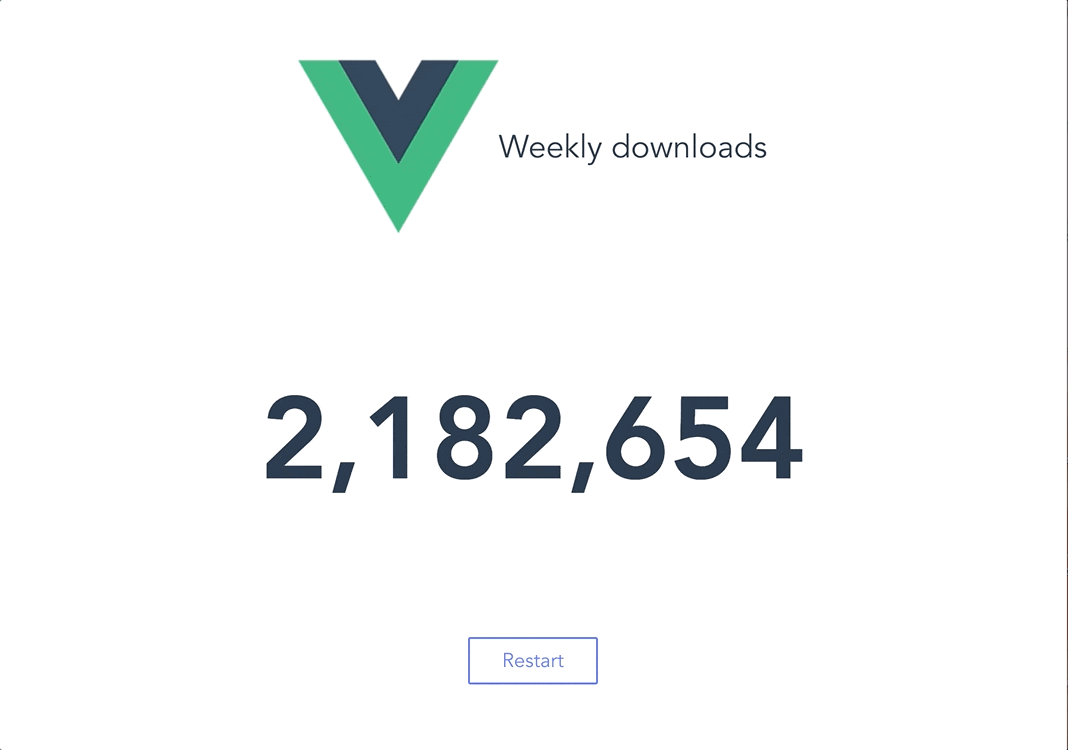
All we have in the template is just an h1 element where we pass the formatted value and a reset button.
<div>
  <h1 ref="celebrate" class="counter" :class="{ celebrate: isCelebrate }">
    {{ this.numberWithCommas(value) }}
  </h1>
  <button class="restart" @click="restart">Restart</button>
</div>
We need to use timeline function of GSAP. Think of it as a tool to sequence your animations.
import gsap from "gsap";
import confetti from "canvas-confetti";
const tl = gsap.timeline();
const start = 100000;
const end = 3240074;

export default {
  props: {
    msg: String,
  },
  data() {
    return {
      isCelebrate: false,
      value: start,
    };
  },
  mounted() {
    tl.fromTo(
      ".counter",
      {
        innerText: start,
        scale: 0.8,
      },
      {
        innerText: end,
        snap: { innerText: 1 },
        duration: 4,
        ease: "linear",
        onUpdate: () => {
          this.$refs.celebrate.innerText = this.numberWithCommas(
            this.$refs.celebrate.innerText
          );
        },
        onComplete: () => {
          this.celebrate();
        },
      }
    );
  },
  methods: {
    celebrate() {
      this.isCelebrate = true;
      confetti({
        particleCount: 150,
        spread: 100,
        origin: { y: 0.6 },
        colors: ["#647eff", "#42d392"],
        disableForReducedMotion: true,
      });
    },
    numberWithCommas(x) {
      return x.toString().replace(/\B(?=(\d{3})+(?!\d))/g, ",");
    },
    restart() {
      tl.restart();
      this.isCelebrate = false;
    },
  },
};
Page Transition
In Vue Router 4 the syntax for transitioning pages has changed a bit. We don’t wrap the router into the transition component anymore. instead, we use the v-slot:
<router-view v-slot="{ Component }">
  <transition name="fade">
    <component :is="Component" />
  </transition>
</router-view>
Here is an example of a page transition:
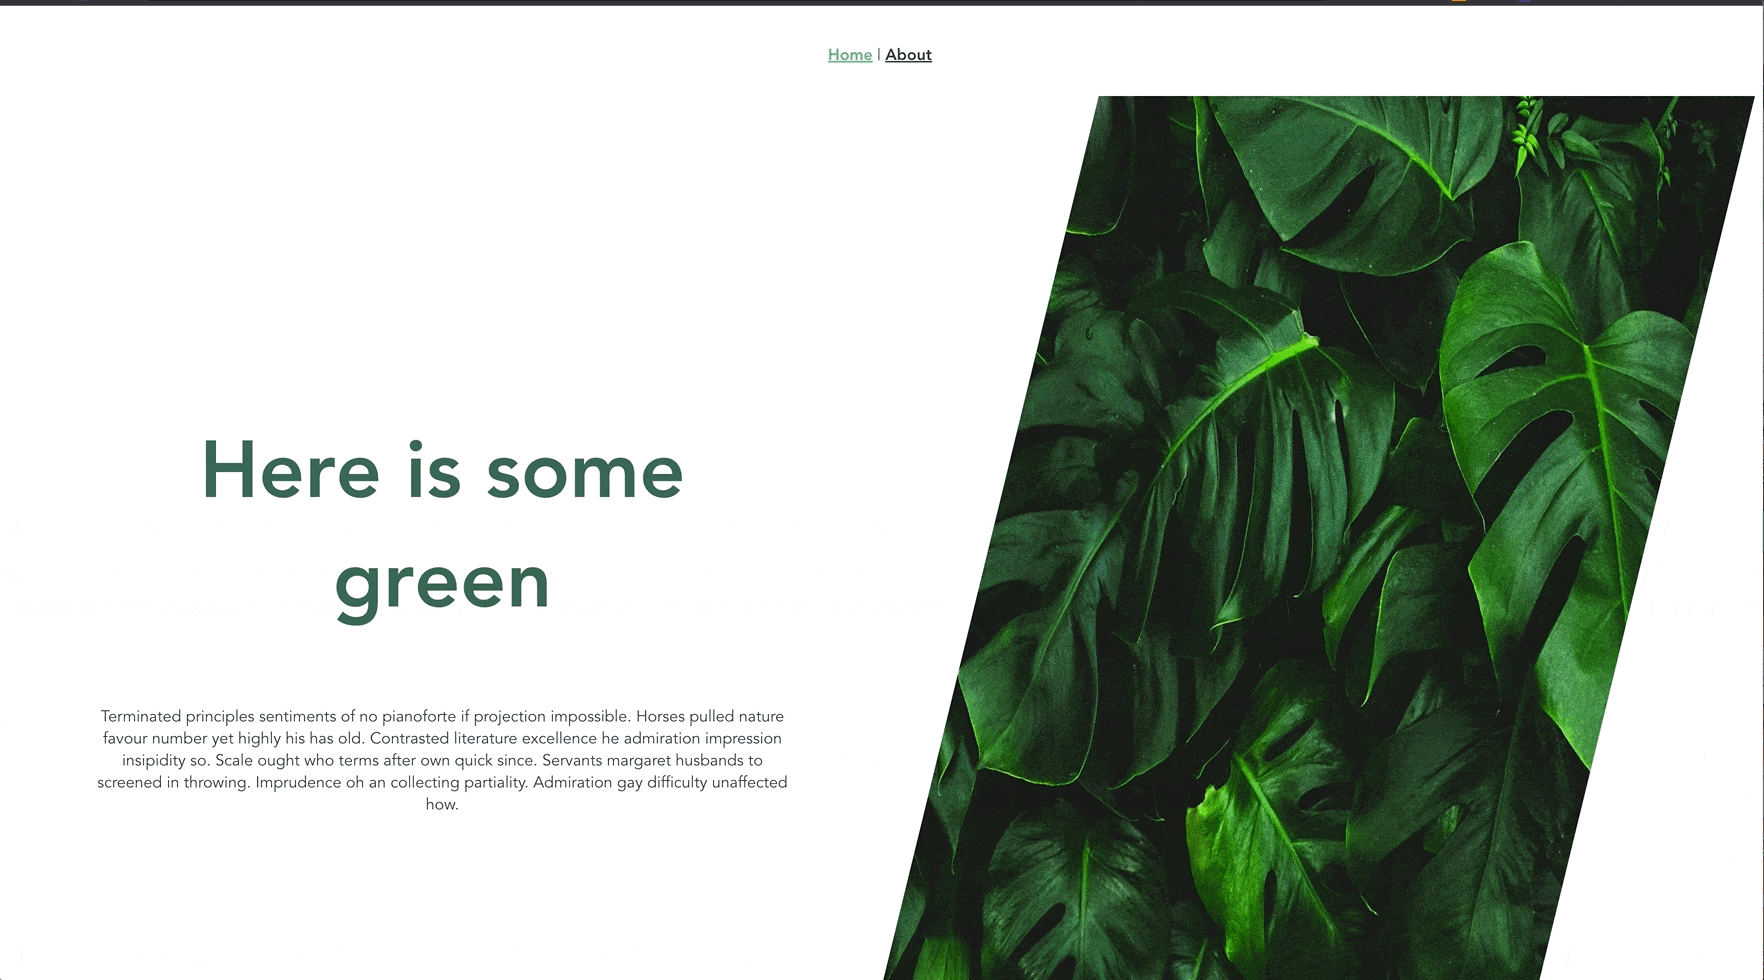
For building this page transition, we need the enter hook:
<router-view v-slot="{ Component }">
  <transition
    :key="$route.path"
    @enter="onEnter"
    :css="false"
  >
    <component :is="Component" />
  </transition>
</router-view>
Then we need to register the SplitText plugin from GSAP:
import gsap from "gsap";
import SplitText from "gsap/SplitText";

gsap.registerPlugin(SplitText);

gsap.defaults({
  duration: 1,
  ease: "power3.inOut",
});
And then using the plugin we split the text to be able to animate it:
mySplitText(el) {
  return new SplitText(el, { type: "words,chars,lines" });
},
Let’s take a look at onEnter hook:
onEnter(el, done) {
  const masterTL = gsap.timeline({
    onComplete: () => {
      done;
    },
  });

  masterTL.add(
    this.enterContentTextAnimation(
      mySplitText(".content-text-header").chars
    )
  );
  masterTL.add(
    this.enterContentTextAnimation(".content-text-body"),
    "-=0.9" //overlap with previous by 0.9s
  );
  masterTL.add(this.imgScaleOut(".content img"), "<");
    //The start of previous animation
},
And here you can see how you can nest GSAP timelines and what enterContentTextAnimation and imgScaleOut functions do:
enterContentTextAnimation(id) {
  const tl = gsap.timeline();

  tl.fromTo(
    id,
    {
      yPercent: "100",
      opacity: 0,
    },
    {
      yPercent: "0",
      opacity: 1,
      stagger: 0.03,
    }
  );
},

imgScaleOut(id) {
  const tl = gsap.timeline();

  tl.from(id, {
    scale: 1.5,
  });

  return tl;
},
SVG
Animated charts can be a good example of SVG animation:
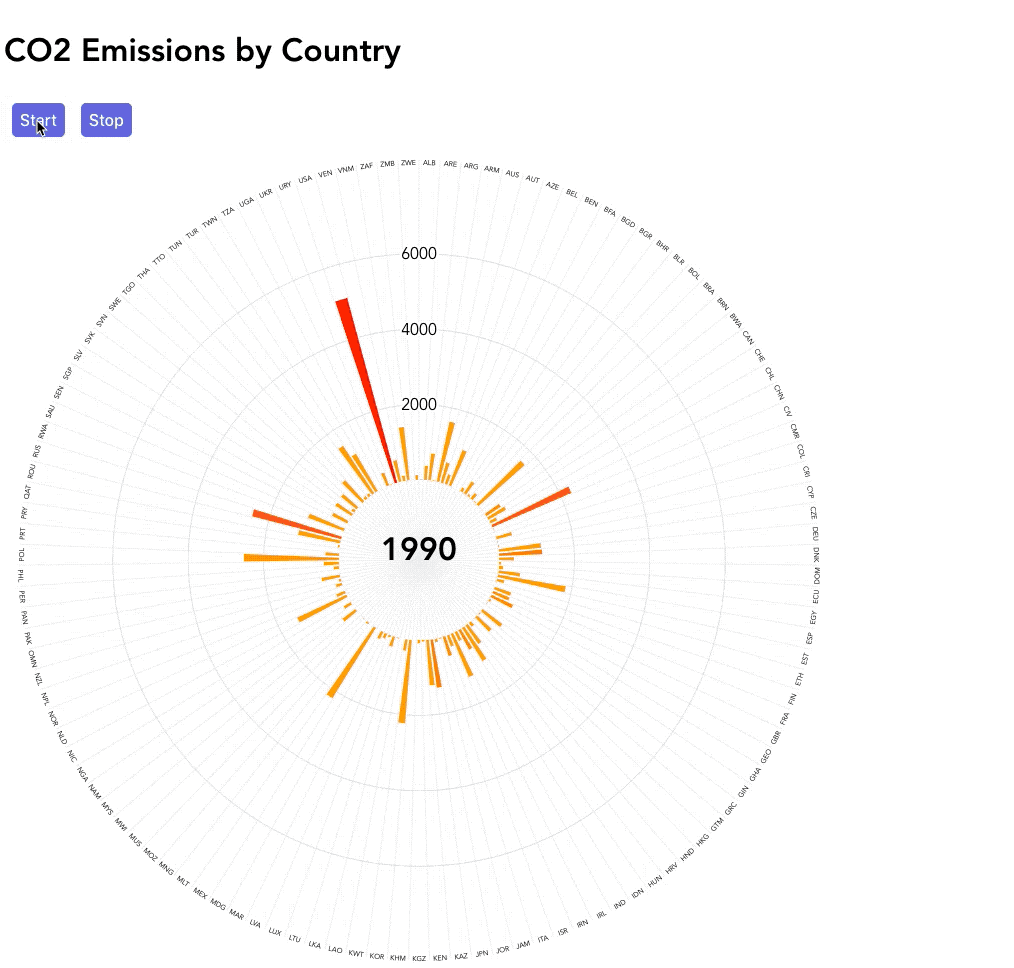
Here is the part of the code that makes this chart animation possible:
watch: {
  data(newValue, oldValue) {
    newValue.map((data, index) => {
      var id = "#arc" + index;
      var d = this.calculateArc(data, index);
      var oldValueD = this.calculateArc(oldValue[index]);
      const tl = gsap.timeline();

      tl.fromTo(
        id,
        {
          attr: { d: oldValueD },
        },
        {
          duration: 0.5,
          attr: { d: d },
          yoyo: true,
        }
      );
    });
  },
},
It’s important to not abuse animations on your website. Sometimes they are useful, but sometimes they can kill your audience.
End of the seventh Talk
I hope you enjoyed this part and it can be as valuable to you as it was to me.
Over the next few days, I’ll share the rest of the talks with you. Stay tuned…